
Google Analytics is not only a powerful free tool that helps you understand and improve the details of your website performance and visitors, but plays an important role in ensuring that your website is found on Google and set up for conversion.
It provides in-depth analysis about the behavior of your visitors, audience data including age, gender, interests, devices they use, and where they are based as well as how visitors are driven to your website, so that you can use that data to align your digital and marketing strategy, set your online goals and measure your online performance.
Google Analytics helps you understand your bounce rate, where your website is not optimized and learn what people are actually looking at on your website. What this means is that you're able to understand your website traffic behavior, adjust your digital strategy and give then more of what they want so they stay on your site longer.
Google Analytics offers a host of features but the purpose of this article is to get you set up so that you can start working with your website data.
Set up a Google Account for your business at https://myaccount.google.com.
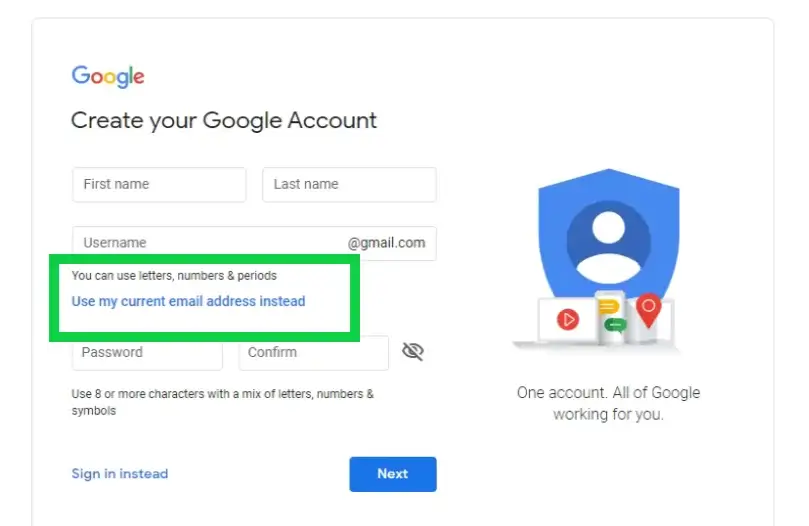
When creating your Google Account, select “Use my current address instead” and use your business email address. This will allow you to keep your personal accounts separate from your business accounts and when you log into Google Ads and Google Analytics, you will log in with your business details.
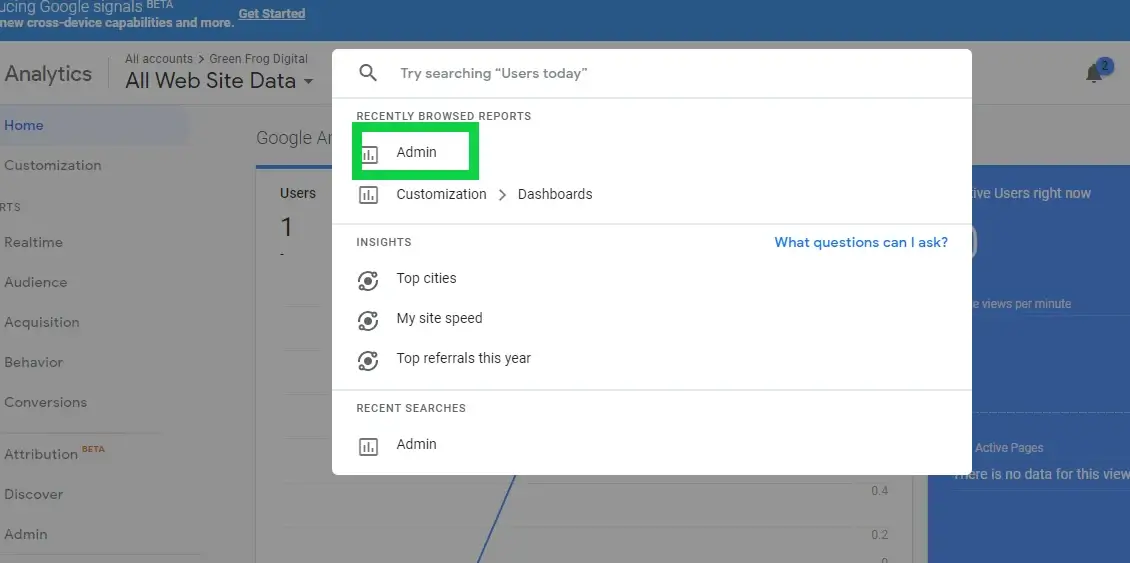
Sign into Google Analytics https://analytics.google.com with your business account as created earlier.
- Click “Admin”.
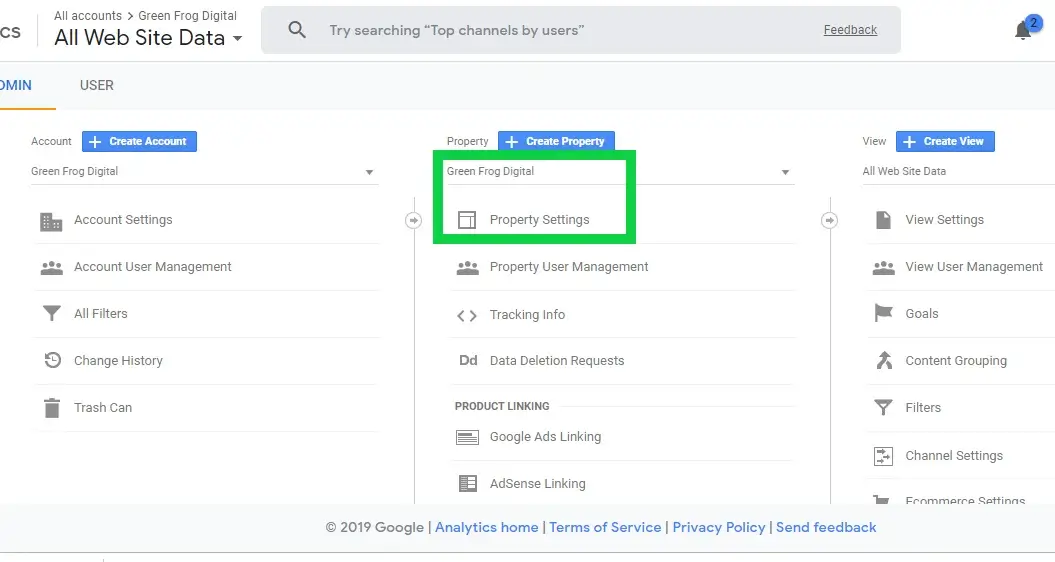
- In the ACCOUNT column, select “+Create Account”.
- Click “Website”.
- Under “Setting up your Account”:
- Enter an “Account Name” - from the menu and name your account, I’d recommend your business name but use a specific and descriptive name, so you can easily tell what this account is for when you see the name in the “Account” list.
- Accept the default to add the account to your current organization. Clear the check box to create the account outside the organization.
- Under Setting up your property, enter the Website name. Note that your website will be listed as a “property” in Google Analytics.
- (Web only) Enter the Website URL – Note that you cannot create a property if your URL isn’t formatted correctly. Format your domain name with http:// www…. Or http://www...
- Select an “Industry Category”.
- Select the “Reporting Time Zone”. This is used as the day boundary for your reports, regardless of where the data originates.
- Under the “Data Sharing Settings” section, select the settings you want.
- Click “Get Tracking ID”. This is the Global Site Tag (gtag.js) tracking code for your property. You will copy and paste this code as the first item into the head of every webpage you want to track. If you already have a Global Site Tag on your page, simply add the config line from the snippet to your existing Global Site Tag.
Sign into your Google Analytics account and click on the search bar – a drop down list will appear, and you’ll click on “Admin”.
In the Property column, select “Property Settings”. Make sure that when you are adding a property you include the correct domain format (http or https).
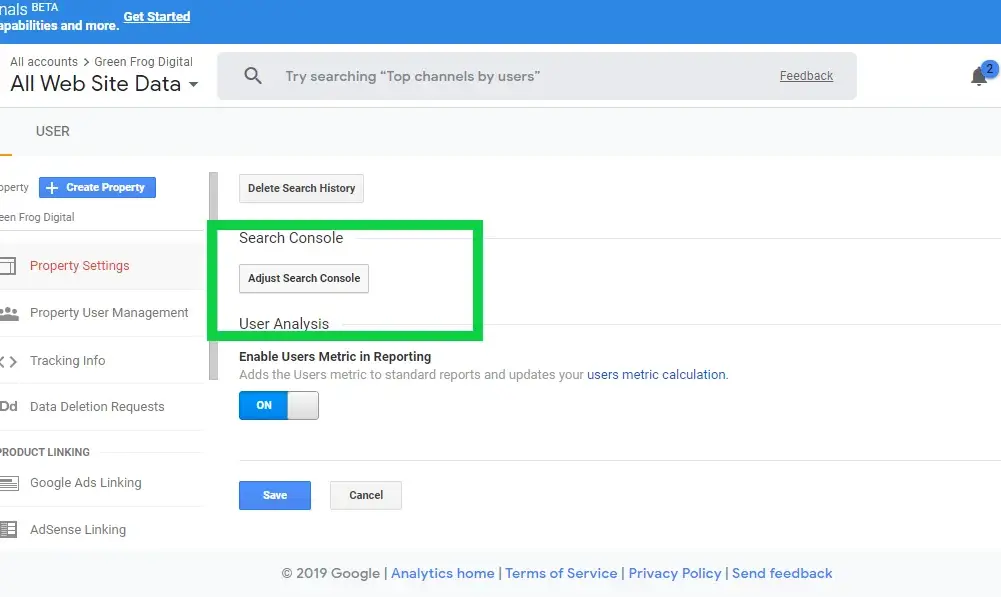
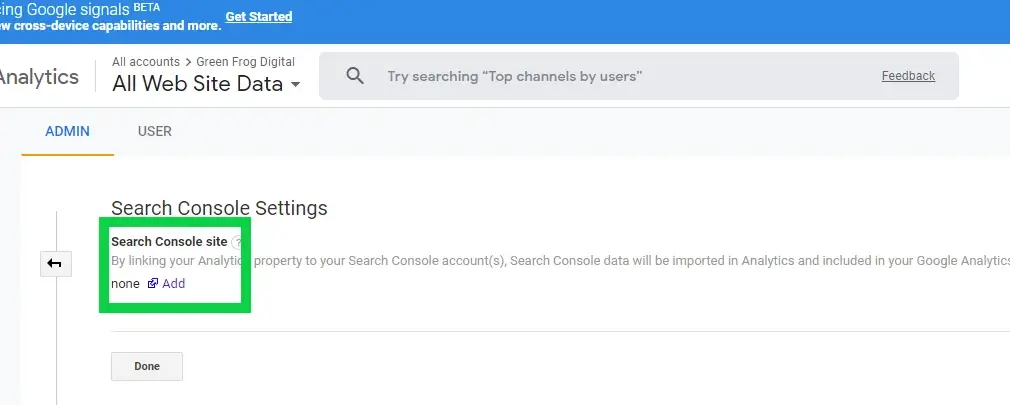
Scroll down to Search Console and select “Adjust Search Console”
In your Search Console Settings – select “Add”.
Select “Add a Site to Search Console”.
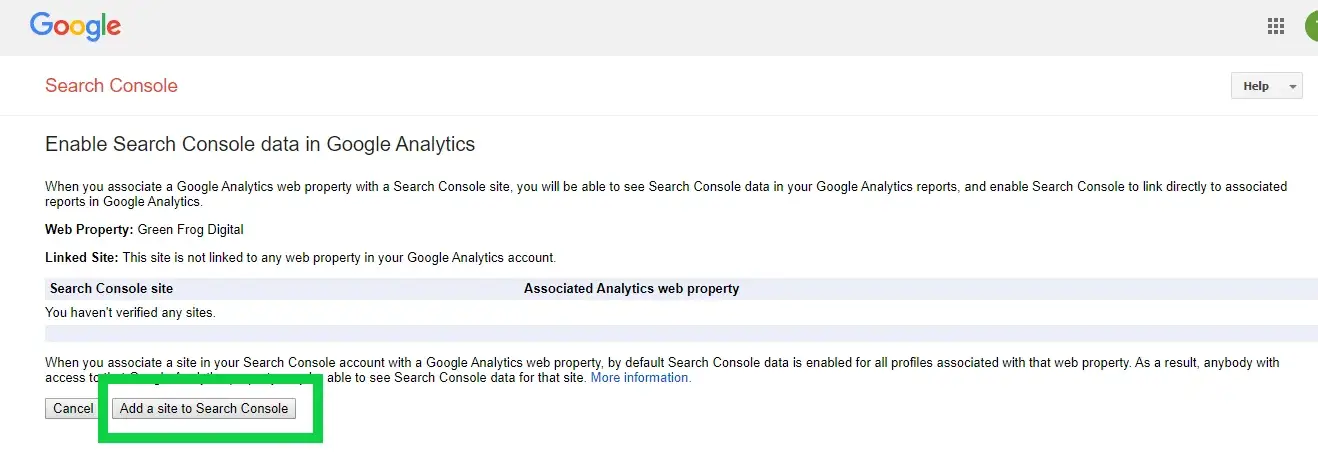
You will be directed to Google Search Console verification process, where you will type in your domain name (remember to allocate the correct http) and follow the instructions.
You will need to log into the back end of your hosting profile with your hosting provider and a create a DNS record which will be done in in your DNS Editor. Copy the TXT file provided into the new DNS record and then you’ll most likely need to add a TTL (Time to Live) – this can be 3600 or 7200 (this is the amount of seconds it will take to make it live).
Once the record has been created you need to give it a good ten minutes and then refresh Google Console to continue.

In order to avoid polluting your website data, you want to create filters that prevent your and other IP addresses that are not considered "traffic" (i.e.: employees and internal IP addresses) from impacting your data.
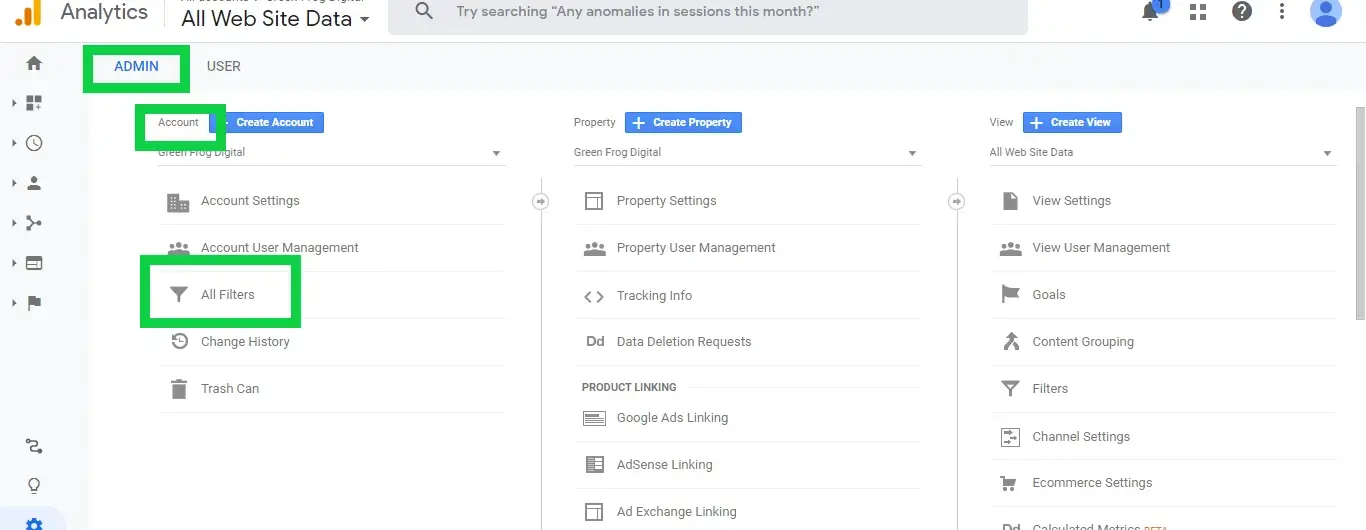
In order to filter your IP address, go to your Admin tab and select "All Filters" under "Account". Get your IP address here.
- Click on "Add Filter" and give your filter a name.
- Under "Filter Type" select "Predefined".
- Under "Select File type", select "Exclude".
- In the "Select source or destination", select "traffic from the IP addresses".
- In "Select expression", select "that are equal to".

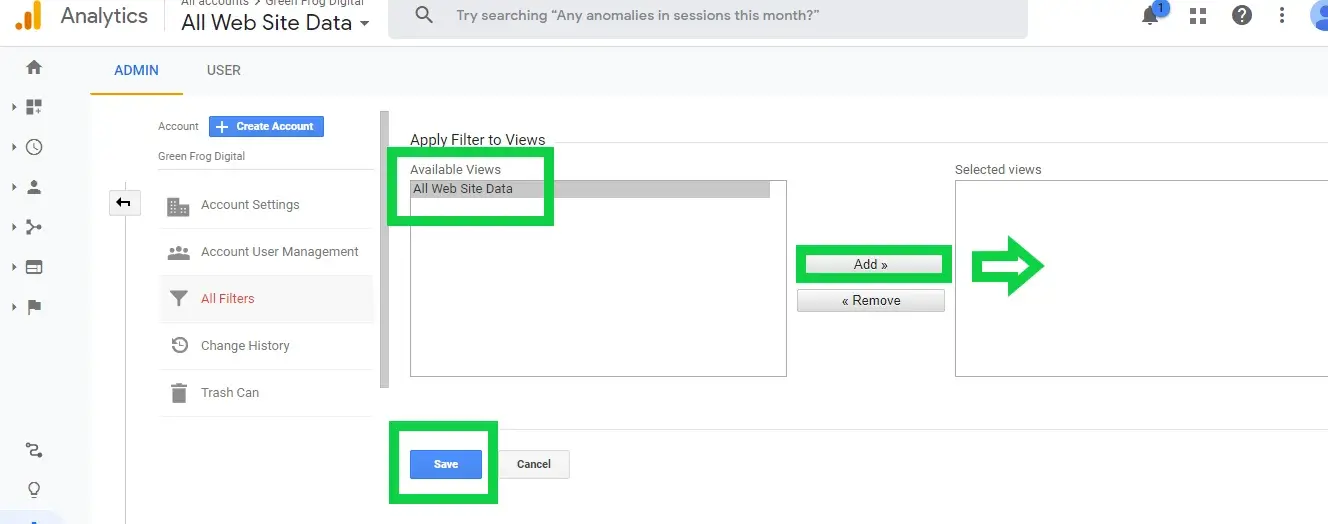
Then under "Apply Filter to Views", select "All Web site Data" and "Add" to "Selected Views". Then "Save".
There are many filters to apply but this is the most important one while you're setting up your website and accounts to keep your data as clean as possible.